Generating Azure AD MFA Status Report Using PowerShell
Generate MFA status report with summary and graphs using the PsMFAStateReport PowerShell module.

Nowadays, securing your credentials is an essential part of your online life. Organizations are (slowly but surely) implementing multifactor authentication (MFA) to safeguard their users’ identities. And if you are an Azure AD admin, then so should you.
Perhaps you’ve already enabled MFA. Now what? How do you track if your users have already registered and set up their MFA details? There are reports available in the Azure AD portal, or you can manually run commands in PowerShell (which you should already know, right?).
However, in most cases, admins will want to set up scheduled and unattended reporting. And that’s where the PsMFAStateReport module can help.
Requirements
MSOnlinemodule. This module retrieves the Azure AD user details using theGet-MsolUsercmdlet under the hood.An admin account with at least the User Administrator role assigned. This account is what you’ll use to connect to Azure AD and is the required minimum to read MFA-related user properties.
REMINDER!!! - If you plan to run this module unattended, such as with the Task Scheduler, your admin account should not be MFA-enabled.
- An SMTP or mailbox account for sending the email report. Unless you have an SMTP relay that does not require an account to send external emails. In Microsoft 365, you could use a shared mailbox account as the sender mailbox.
Installing the PsMFAStateReport Module
Note: Since this module depends on the
MSOnlinemodule, it follows that you can only use this module reliably in Windows PowerShell 5.1 at the latest.
- Download the latest release.
- Extract the zip file and run the
.\InstallMe.ps1script in PowerShell. When asked where to install the module, press the corresponding number to your choice. The example below installs the module to
2: C:\Program Files\Windowspowershell\Modules. Doing so assumes that you are installing the module from an elevated PowerShell session (as admin).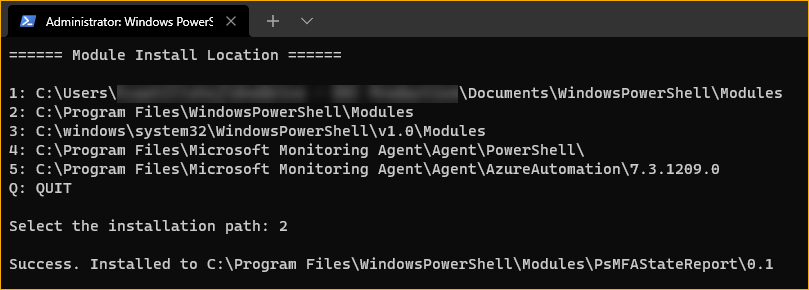
After the installation, there will be three new commands available to use.
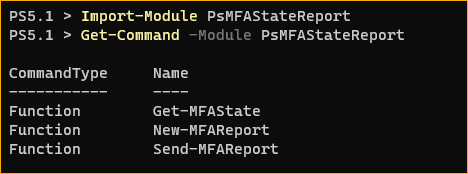
Get-MFAState- Retrieves the MFA user state details from Azure AD.New-MFAReport- Generates the report summary email and graphs to your specified destination folder.Send-MFAReport- Send the report via email.
Using the PsMFAStateReport Module
Note: The subsequent steps assume that you already have PowerShell open and connected to Azure AD using the
Connect-MsolServicecommand
Step 1: Retrieving User MFA Data
Note: By default, all PsMFAStateReport commands will not display any information on the screen during run time except for warnings and errors. To display all available information, either set the
$InformationPreferencetoContinueor append the-InformationAction Continueparameter to every command.
There are four options to retrieve user MFA data using the Get-MFAState command. Which option you choose depends on which set of users you want to generate a report for.
Option 1: Retrieve the MFA data of all users.
1
$mfa_data = Get-MFAState -AllUsers

Option 2: Retrieve the MFA data of all admins only.
1
$mfa_data = Get-MFAState -AdminOnly
Option 3: Retrieve the MFA data of a collection of users:
1
2
# Retrieve the MFA data of the first 10 Azure AD users
$mfa_data = Get-MFAState -UserObject (Get-MsolUser -MaxResults 10)
Option 4: Retrieve the MFA data of one or more users by their UserPrincipalName values:
1
2
$upn = @('user1@domain.com','user2@domain.com')
$mfa_data = Get-MFAState -UserPrincipalName $upn
At this point, the MFA data you already be exported to CSV (Export-Csv) if that’s all you need. Otherwise, proceed to the next step.
Step 2: Generate the Report
After retrieving the MFA data in the previous step, you’ll use that data to generate the report using the New-MFAReport command.
The New-MFAReport command only has two parameters:
-InputObjectaccepts the MFA data you retrieved from the previous step.-ReportDirectoryspecifies the directory to save the report files (HTML, CSV, and PNG files). If the directory does not exist, the command will attempt to create it.
To generate the report:
1
New-MFAReport -InputObject $mfa_data -ReportDirectory 'C:\temp\mfareport'
Alternately, you can also pass the MFA data through the pipeline because the -InputObject parameter accepts values from the pipeline values like so:
1
$mfa_data | New-MFAReport -ReportDirectory 'C:\temp\mfareport'
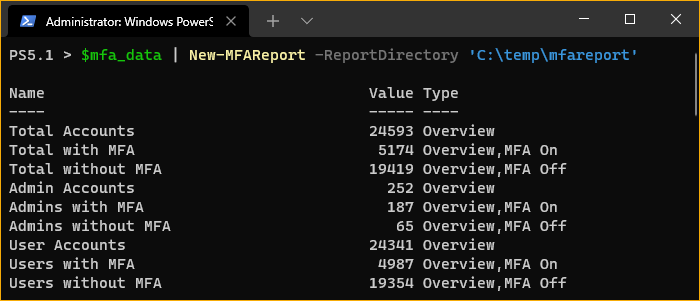
After generating the report, confirm that you now have the report files in the report directory. As you can see below, the CSV file, HTML, and PNG resource files were created.
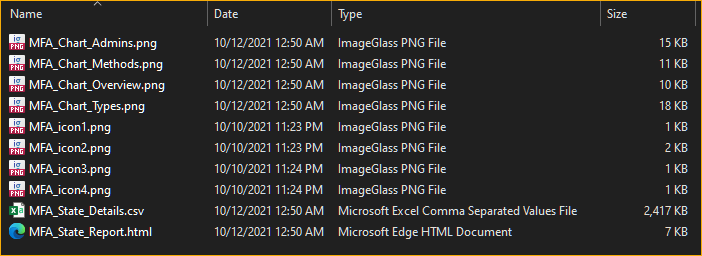
You can now use these reports as they are if you want to stop here. But if you want to send these reports in an email, proceed to the last step.
Step 3: Send the Report
Finally, after generating the MFA status report, sending the report via email to intended recipients only requires you to run the Send-MFAReport command.
At a minimum, if you’re using an anonymous SMTP relay on port 25, the below code snippet should be enough to send the report.
1
2
3
4
5
Send-MFAReport `
-ReportDirectory 'c:\temp\mfareport' `
-SmtpServer 'smtp.server.here' `
-From 'Sender name <sender@domain.com>' `
-To @('recipient1@domain.com', 'recipient2@domain.com')
The parameters used in the above code are:
-ReportDirectoryspecifies the directory where it will get the report files.-SmtpServerspecifies the SMTP relay server IP address or name.-Fromspecifies the sender’s email address.-Tospecifies the list of recipients.
Other Send-MFAReport parameters:
-Portspecifies the SMTP port number to use. If not specified, the default is 25.-UseSSLis a switch parameter to specify if the SMTP relay requires SSL/TLS connection. For example, Exchange Online (smtp.office365.com) relay requires this.-Credentialspecifies thePSCredentialobject used to authenticate to the SMTP server if required.-Ccused to add Cc recipients.-Bccused to add Bcc recipients.-AttachCsvdetermines if the CSV file will be attached to the email report. The default value is-$true. If you don’t want to attach the CSV file, set this parameter value to$false.-ZipCsvSizeinMBthe size threshold (of the CSV file in MB) before the command compresses the CSV file before attaching it to the email report. If not specified, the default value is2, which means that if the CSV file size is 2MB or bigger, it will be compressed into a zip file before sending the email.
If sending through an authenticated SMTP relay such as Exchange Online, use the code below as example:
1
2
3
4
5
6
7
8
9
10
11
12
13
14
15
16
17
18
19
20
21
22
# Create the SMTP credential object programmatically
$userName = 'username here'
$userPassword = 'password here' | ConvertTo-SecureString -AsPlainText -Force
$smtpCredential = [System.Management.Automation.PSCredential]::new($userName, $userPassword)

# OR, if manually, you can run: $smtpCredential | Get-Credential

# Compose the email properties splat.
$mail_splat = @{
    SmtpServer      = 'smtp.office365.com' # SMTP server address.
    Port            = 587 # SMTP server port number.
    UseSSL          = $true # SMTP server required SSL/TLS.
    Credential      = $smtpCredential # SMTP server credential object.
    From            = 'Sender display name <sender@domain.com>' # sender address.
    To              = 'to1@domain.com', 'to2@domain.com', 'to3@domain.com' # to recipients.
    CC              = 'cc1@domain.com','cc2@domain.com' ## cc recipients.
    Bcc             = 'bcc1@domain.com','bcc2@domain.com' ## bcc recipients.
    ReportDirectory = 'c:\temp\mfareport' # directory containing the report files.
    ZipCsvSizeinMB  = 3 # Zip the CSV file is the filesize is 3MB or bigger.
}
# Send the report
Send-MFAReport @mail_splat
The Final Results
Email Report
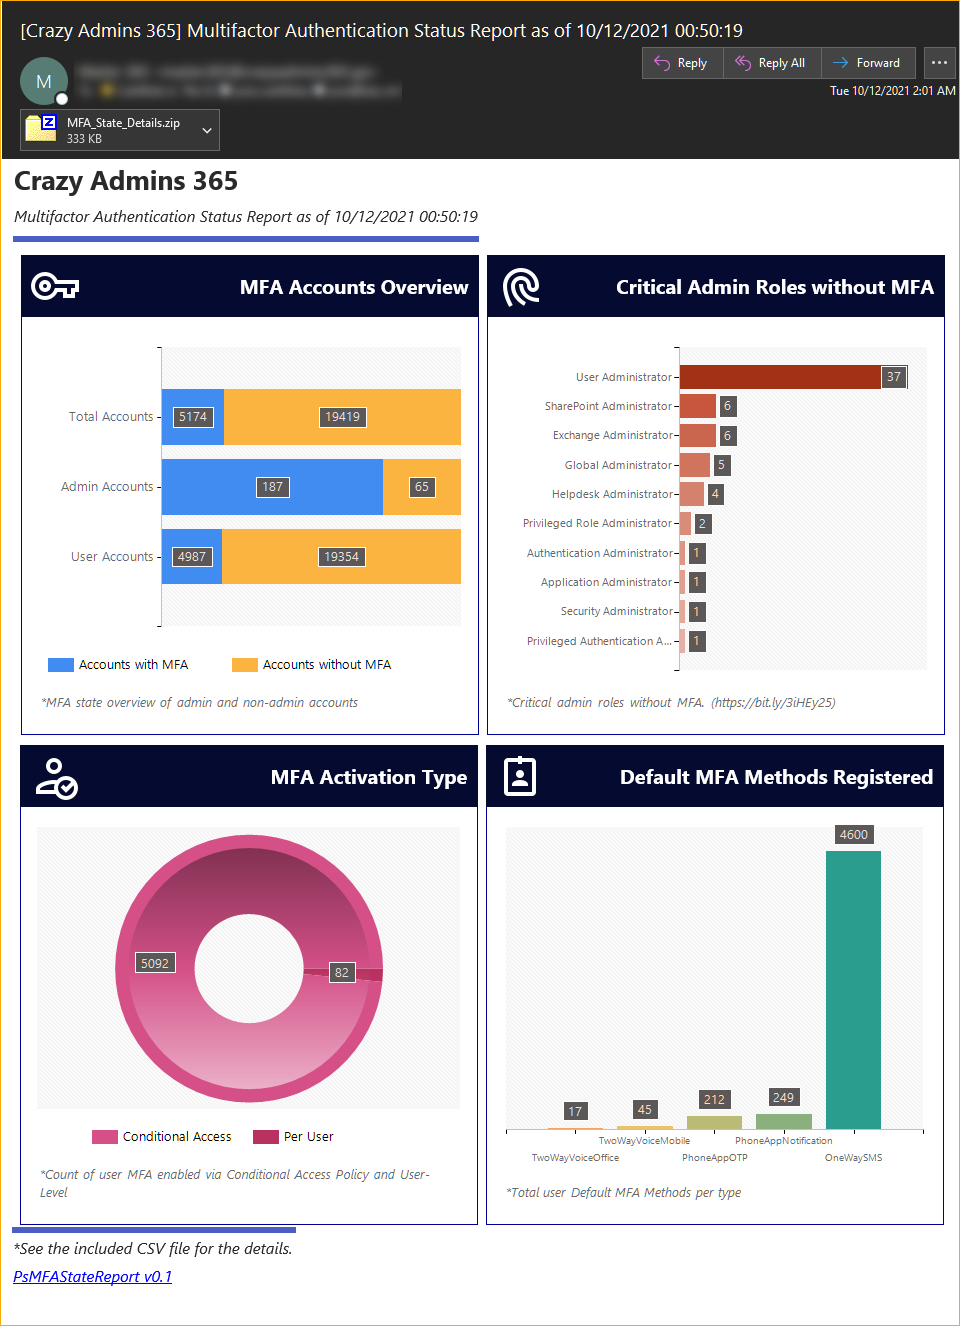
The image below is similar to what your recipient should recieve in their email. As you can see, there are four visual cards that shows the summary of different MFA-related statistics.
Admittedly, I am not a UI/UX designer :)
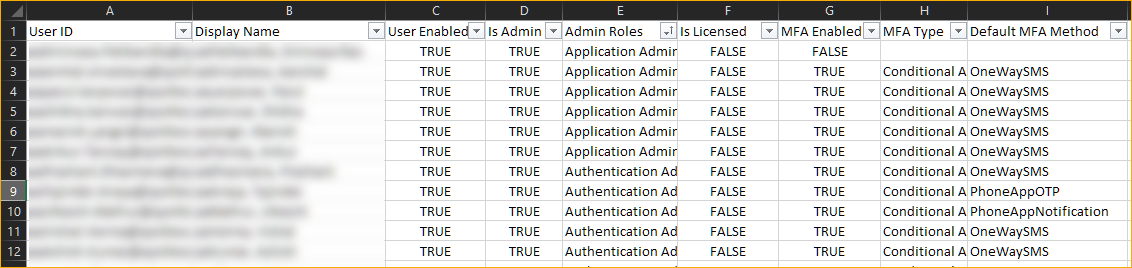
CSV File Report
The CSV report, as shown below, contains the MFA details from where the HTML and email report derived from.