How to Create an NTPasswd Bootable USB Drive
Learn how to create a bootable NTPasswd USB drive for when you need to reset a Windows user password or edit the registry offline.
We’re humans and we forget things like passwords. But if you forget your Windows 10 user account password, you can still reset it so you can gain access to your computer again. And for that, you’ll need the NTPasswd utility.
NTPasswd is an old tool (last update was on 2014) that admins and users can use to reset local user passwords, promote standard users to administrators, and enable/unlock users including the built-in administrator account.
There are two ways to use NTPasswd; from a CD or USB. In this post, you will learn ways to create a bootable USB drive containing the NTPasswd utility.
Requirements
- An empty USB flash drive.
- A Windows computer where you’ll create the bootable USB. This tutorial will be using a Windows 10 PC.
- Download the NTPasswd USB installer. As of this writing, the latest installer file name is usb140201.zip.
Creating the NTPasswd Bootable USB Drive
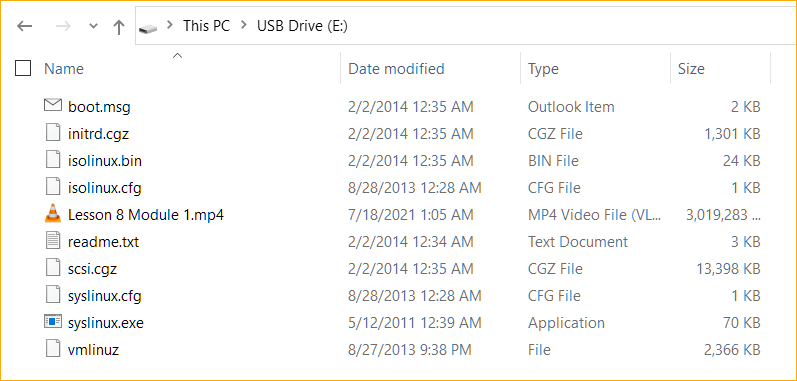
After downloading the NTPasswd USB installer file, extract its contents into the root of the USB flash drive. The image below shows the files on the USB flash drive’s root folder after the extraction.
Next, open an elevated command prompt window. To do so, press
CTRL+R, type incmdand press Enter.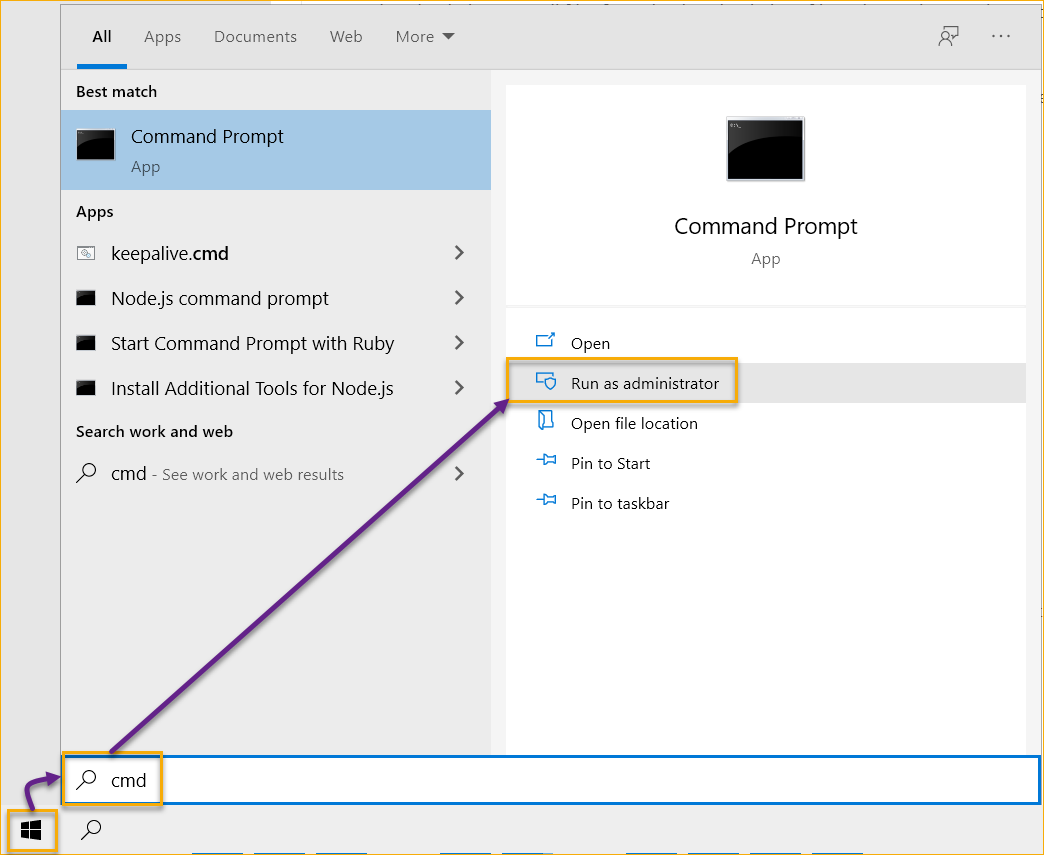
Now, execute the
syslinux.execommand to make the USB drive bootable. To do so, run the command below.# The -ma switch means to (m) install the master boot record (MBR) and (a) mark the partition as active. # The E: is the drive letter of the USB drive. Yours may be different. E:\syslinux.exe -ma E: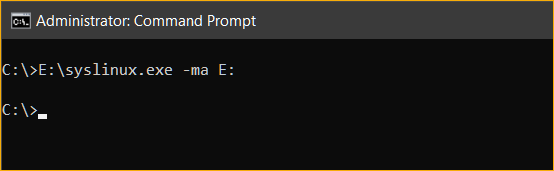
That’s it! You now have a bootable NTPasswd USB drive.