How to Generate Microsoft 365 Usage Reports in PowerShell
Learn how to generate Microsoft 365 usage reports in PowerShell with HTML and email output using the PS.M365UsageReport module
The Microsoft 365 admin portal offers a Usage Report view that provides a quick glance at service activity across your organization. While convenient for high-level insights, it falls short when you need a detailed, comprehensive report covering all services, or when you need to automate reporting on a regular schedule.
In this post, we’ll show you how to generate a complete Microsoft 365 usage report using PowerShell. Leveraging the Microsoft 365 Usage Report PowerShell module, you can create an HTML-based report with the option to include raw CSV data. This approach is ideal for scheduled reporting, auditing, or sharing with stakeholders via email—providing a level of flexibility and detail that the portal alone cannot offer.
Overview
This PowerShell module exports Microsoft 365 usage reports using the Microsoft Graph API and the Exchange Online Management PowerShell Module. The results are saved locally and can also be sent by email.
The reports that can be exported using this script are:
- Assigned Licenses Report Count
- Exchange
- SharePoint
- OneDrive
- Skype for Business
- Teams
- Yammer
- Microsoft 365
- Users
- Activations
- Exchange Reports
- Mailbox Status (Active/Inactive)
- Mailbox Provisioning (Created/Deleted)
- Mailbox Quota
- Email App Usage
- Office 365 Groups Provisioning
- Mail Traffic (Inbound/Outbound)
- Spam and Malware Detection (Count)
- ATP Mail Detection (ATP Safe Links, ATP Safe Attachments)
- Top 10 Mail Senders
- Top 10 Mail Recipients
- Top 10 Spam Recipients
- Top 10 Malware Recipients
- Top 10 Malware Detected
- SharePoint Reports
- Total, Active, Inactive Sites
- Storage Used (Tenant)
- OneDrive Reports
- Total, Active, Inactive Sites
- Storage Used (Tenant)
- Microsoft Teams
- Total Users
- Active Users
- Inactive Users
- Guest Users
- Total 1:1 Calls
- Total Channel Messages
- Total Private Chat Messages
- Total Meetings
- Total Audio Duration (minutes)
- Total Video Duration (minutes)
- Total Screen Sharing Duration (minutes)
- Device Usage Distribution
Requirements
- Windows PowerShell or PowerShell 7+.
- The ExchangeOnlineManagement PowerShell Module
- The Microsoft Graph PowerShell Module
For Automation and Unattended Jobs
A registered Azure AD (OAuth) App with the following settings:
Annex: Register a New Azure AD App
- API: Microsoft Graph
- Permission Type: Application
- Permission(s):
Reports.Read.All- For reading the usage reports.Directory.Read.All- For getting the deleted Microsoft 365 Groups and users.Mail.Send- For sending the report by email.
- API: Office 365 Exchange Online
- Permission Type: Application
- Permission(s):
Exchange.ManageAsApp- Exchange Online app-only access.
- API: Microsoft Graph
A new or existing Exchange Online mailbox to use as the report email sender. This can be a shared mailbox without a license.
For Manual and Interactive Use
- The logged-in user must be an Exchange administrator.
- The logged-in user must have Entra access to read the directory and reports, and have a valid Exchange Online mailbox if they plan to send the report by email.
How to Get the Module
Clone or download the script from the repository. After downloading, extract the files to your preferred location.
You can also install the module from PSGallery.
1
2
3
4
5
# Current user
Install-Module PS.M365UsageReport

# All users (requires admin)
Install-Module PS.M365UsageReport -Scope AllUsers
The New-M365UsageReport Command
This module contains several functions, but New-M365UsageReport is the main function to generate the report.
Syntax
1
New-M365UsageReport [[-ReportPeriod] [[-Scope] [[-Exclude] [[-From] [[-To] [[-Cc] [[-Bcc] [[-CustomEmailSubject] [-SendEmail] [-ShowReport] [<CommonParameters>]
Parameters
The New-M365UsageReport function has these parameters.
ReportPeriod- Indicates the reporting period. Valid values are7, 30, 90, 180. If not used, the default value is7.Scope- Specifies the scope of the report (which services/workloads). If not used, the report will include all available workload. This accepts multiple values. Valid values are:Microsoft365ExchangeDefenderATPSharePointOneDriveTeams
Exclude- Specifies which of the sub-reports to exclude. This switch is useful when you’re testing or if there are certain items that you don’t need in the report. This accepts multiple values. Valid values are:Microsoft365AssignedLicensesMicrosoft365ActiveUsersMicrosoft365ProductActivationMicrosoft365GroupsExchangeMailboxUsageAndProvisioningExchangeClientAppUsageExchangeMailFlowExchangeTop10MailTrafficDefenderATPDetectionsSharePointUsageAndStorageOneDriveUsageAndStorageTeamsUsersTeamsUsersActivitiesTeamsDevices
SendEmail- A switch parameter indicating to send the report via email.From- Send email address. This key is required if theSendEmailswitch is used.To- One or more TO recipients. This key is required if theSendEmailswitch is used.Cc- One or more CC recipients. Optional.Bcc- One or more BCC recipients. Optional.
ShowReport- This switch indicates whether the report will be opened automatically in the web browser once generated. Use this only when running the report interactively.
Prerequisite Connection
Before using this module, you must log in to Microsoft Graph and Exchange Online PowerShell.
The example below pertains to using app-only authentication used for automation that requires an Entra app registration. Replace the values with yours.
You may connect using your own admininstrator account so long as it complies with the For Manual and Interactive Use requirements.
1
2
3
4
5
6
7
8
9
10
# Define the connection parameter values
$clientId = 'client-id-here'
$tenantId = 'organization.onmicrosoft.com'
$certificateThumbprint = 'certificate-thumbprint-here'

# Connect to Microsoft Graph
Connect-MgGraph -TenantId $tenantId -ClientId $clientId -CertificateThumbprint $certificateThumbprint

# Connect to Exchange Online
Connect-ExchangeOnline -Organization $tenantId -AppId $clientId -CertificateThumbprint $certificateThumbprint -ShowBanner:$false
 Connect to Graph and EXO
Usage Examples
Generate the 30-day usage report of all workloads and send it by email
1
2
3
4
5
6
7
8
# Import the module
Import-Module PS.M365UsageReport
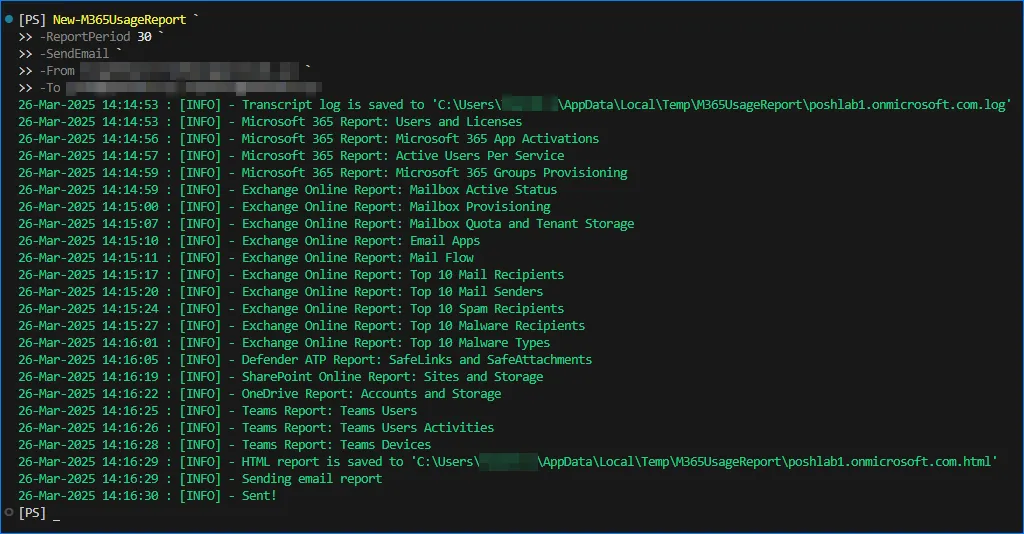
New-M365UsageReport `
-ReportPeriod 30 `
-SendEmail `
-From 'Microsoft365UsageReports@contoso.com' `
-To 'ReportAdmin@contoso.com', 'ReportGroup@contoso.com'
 Generate the 30-day usage report and send it by email
Generate usage reports for selected workloads only
This example shows how to generate the report for selected services or workloads only. For example, SharePoint Online and OneDrive for Business.
The -ShowReport switch will automatically open the HTML report in the default browser. This example will not send the report by email.
1
2
3
4
5
6
7
# Import the module
Import-Module PS.M365UsageReport

New-M365UsageReport `
    -ReportPeriod 30 `
    -Scope SharePoint, OneDrive `
    -ShowReport
The output will be similar to this:
 Generate usage reports for selected workloads only
Annex
Register a New Azure AD App
Navigate to the Microsoft Entra admin center and navigate to App registrations. Then, click New Registration.
 New registration
- In the Name, type in Microsoft 365 Usage Reports (or any name you prefer).
- In the Supported account types, select Accounts in this organizational directory only.
- In the Redirect URI (optional), select Web and type in
http://localhost. - click Register.
 Register an application
After the App has been registered, copy the Application (client) ID and Directory (tenant) ID.
Application details
Adding the Required Microsoft Graph API Permissions
Go to API Permissions and click the Add a Permission button
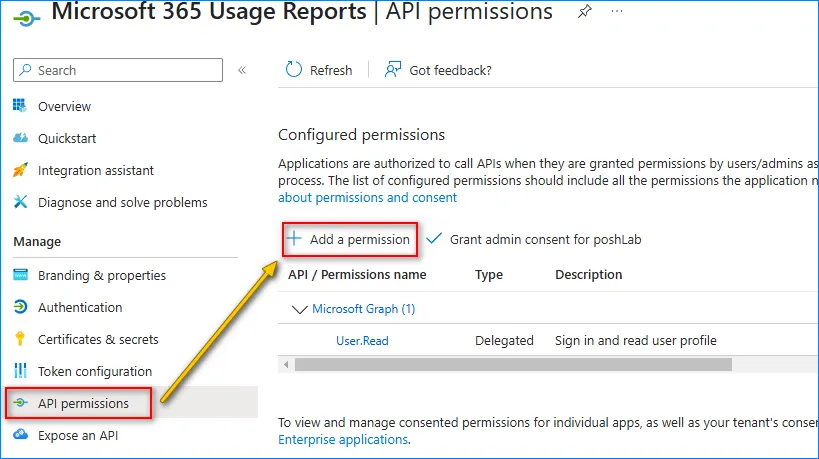 Add a permission
In the Request API Permission, select Microsoft Graph API.
 Request permission
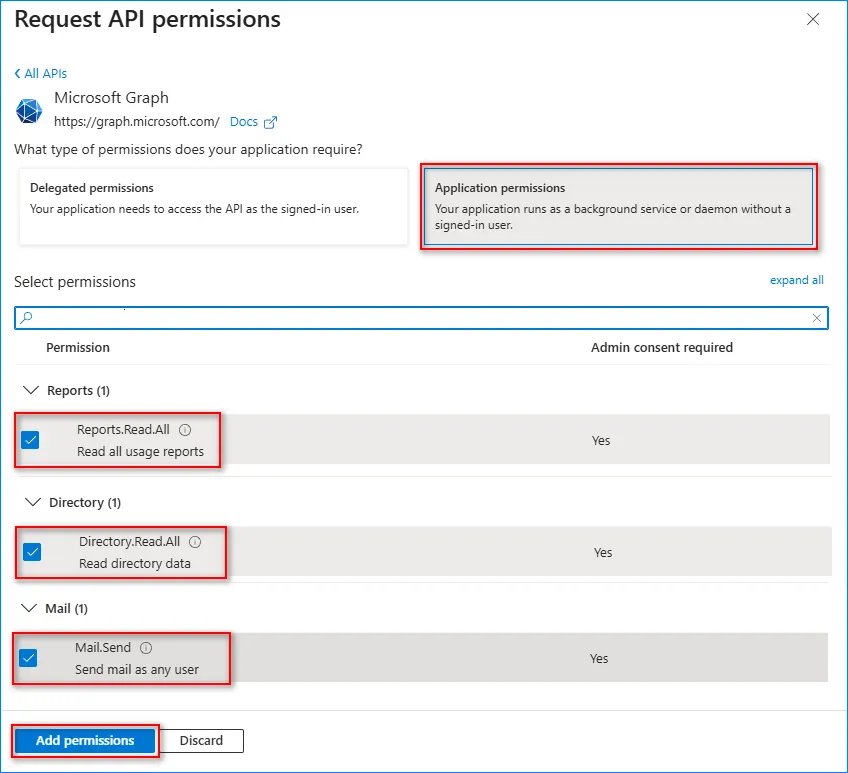
In “What type of permissions does your application require?”, click Application. From the list of permissions, search for and enable the following permissions.
Reports.Read.AllDirectory.Read.AllMail.Send
Once you’re done selecting the permissions, click the Add permissions button.
 Application permissions
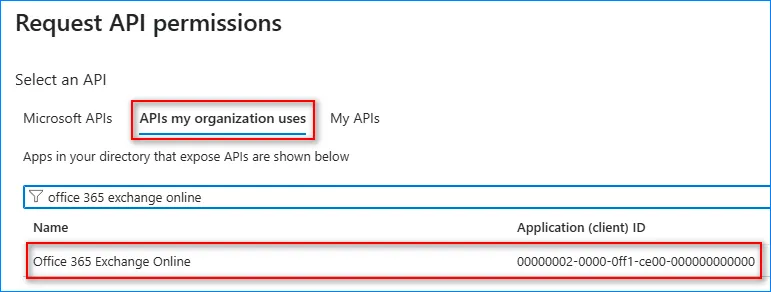
Adding the Required Exchange Online API Permissions
Click Add a permission Under “Request API permissions,” click “APIs my organization uses.” Search Office 36 Exchange Online and click the result.
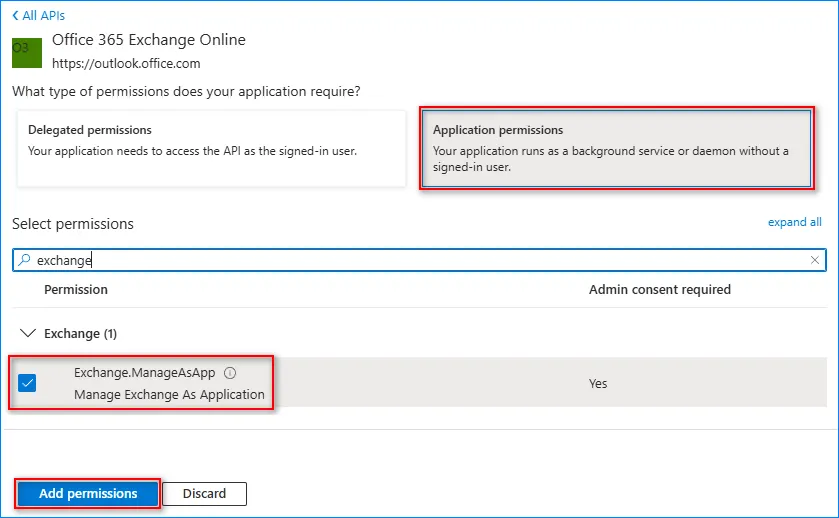
Search and enable the Exchange.ManageAsApp permission and click Add permissions.
Now, remove the User.Read permission as it is not needed.

Creating and Uploading a Self-Signed Certificate
Note: You can use either a Certificate or a Client Secret for API authentication. This example shows you only how to create a certificate.
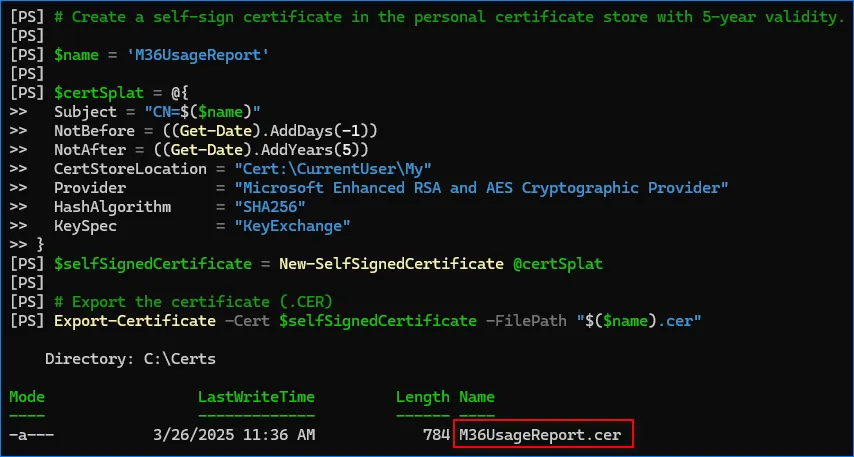
Copy the code below and run it in PowerShell. The script will create a new self-signed certificate in the personal certificate store with a validity of five (5) years. Then, exports the DER-encoded M365UsageReport.cer file to the current working directory.
1
2
3
4
5
6
7
8
9
10
11
12
13
14
15
16
17
# Create a self-sign certificate in the personal certificate store with 5-year validity.

$name = 'M365UsageReport'

$certSplat = @{
  Subject = "CN=$($name)"
  NotBefore = ((Get-Date).AddDays(-1))
  NotAfter = ((Get-Date).AddYears(5))
  CertStoreLocation = "Cert:\CurrentUser\My"
  Provider          = "Microsoft Enhanced RSA and AES Cryptographic Provider"
  HashAlgorithm     = "SHA256"
  KeySpec           = "KeyExchange"
}
$selfSignedCertificate = New-SelfSignedCertificate @certSplat

# Export the certificate (.CER)
Export-Certificate -Cert $selfSignedCertificate -FilePath "$($name).cer"
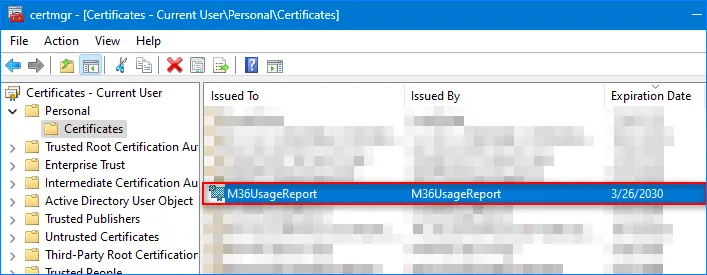
After running the code, you can see the new certificate is in the personal certificate store.
NOTE: If you plan to deploy the script to another machine, make sure to export the PFX certificate to file using the PowerShell Export-PfxCertificate cmdlet or MMC and import it to another machine.
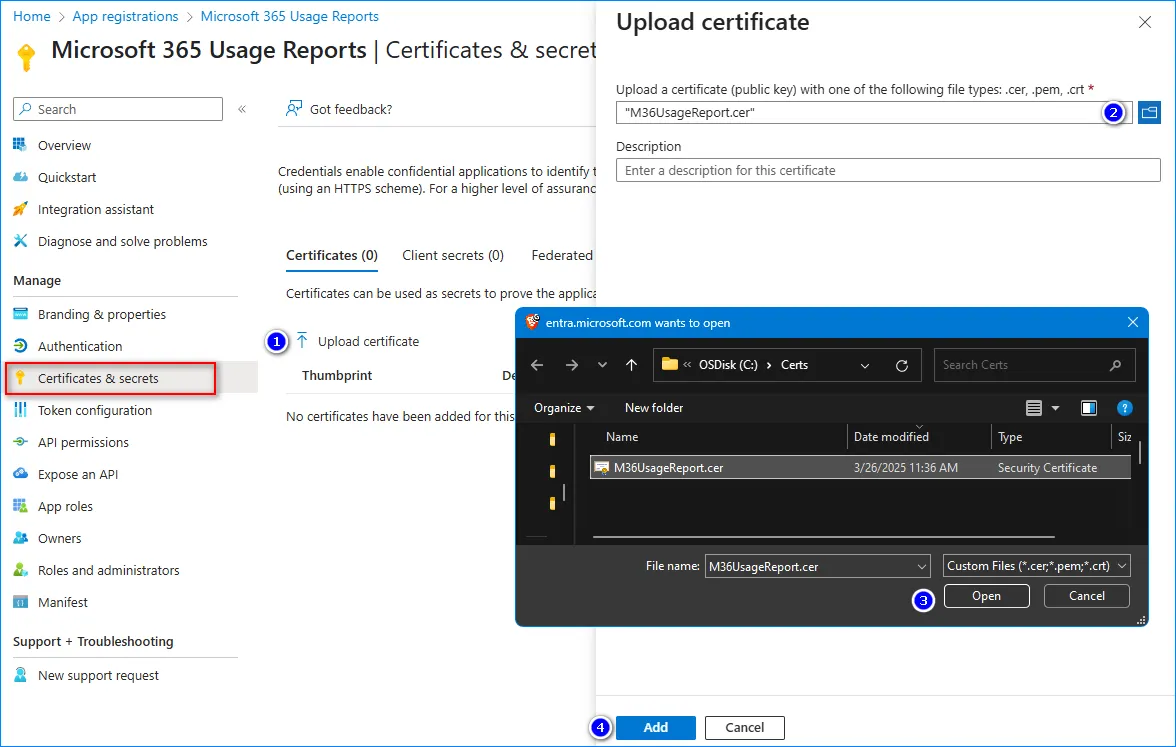
Now that you have the certificate file (.cer), the next step is to upload the certificate to the Entra App. Follow these next steps.
- Go to Certificates & Secrets and click the Upload Certificate button.
- Click the browse button.
- Locate the certificate file and click Open.
- Click Add.
You should now see the certificate was uploaded. Copy the Thumbprint value.

Granting Admin Consent
Note: Only a Global Admin, Application Administrator, and Privileged Role Administrator can grant consent on behalf of the Microsoft 365 Tenant to the application. If you do not have the proper rights, ask another administrator with sufficient role(s) to grant the consent.
You should see that the new API permissions have been added, but the status is ‘Not granted’ for [tenant]. To complete the permission grant, click the “Grant admin consent for [tenant]” button.
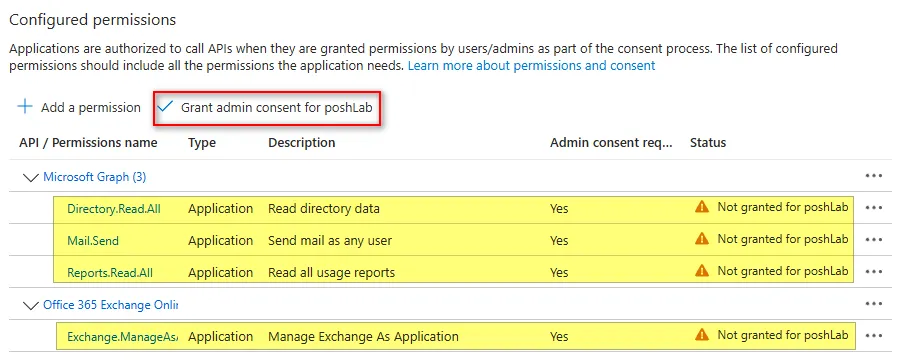
When asked to confirm, click Yes.

The API permissions status should change to Granted for [tenant]
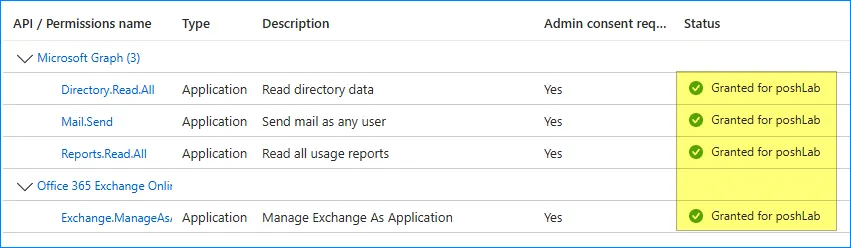 Consent granted
Now you should have the following details available:
Client IDTenant IDCertificate Thumbprint
Assigning the Exchange Administrator Role
This module also connects to Exchange Online PowerShell to generate Exchange-related reports, such as ATP detections and mail traffic summaries. And according to the official Microsoft guide to setting up app-only authentication to Exchange Online, the app’s service principal must have an Exchange Administrator role.
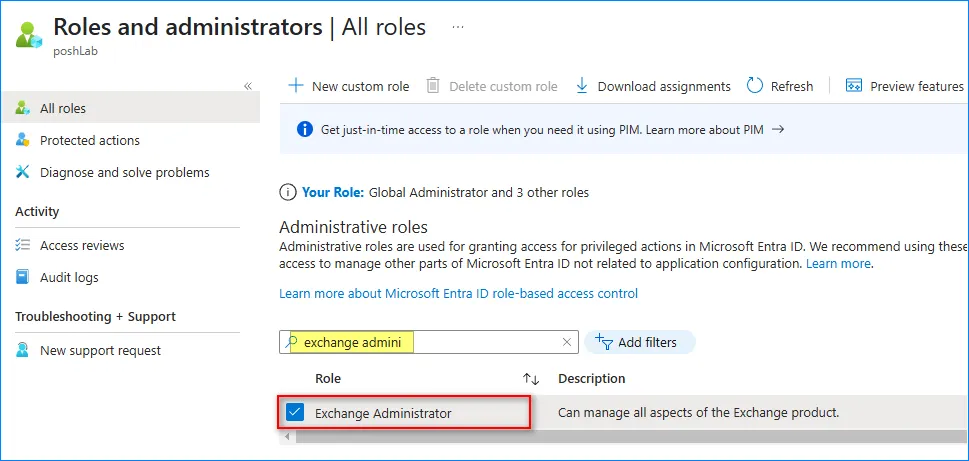
Under the Identity, go to Roles & admin. Search for the Exchange Administrator role and click the result.
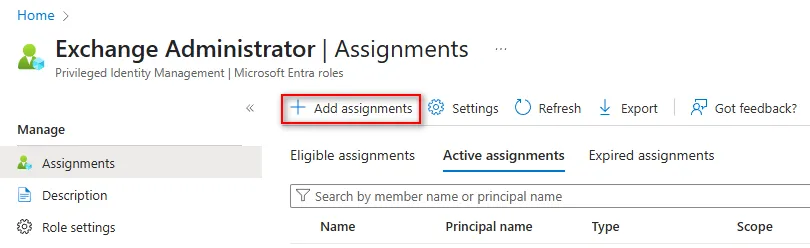
Click Add assignments
Click the No members selected link.
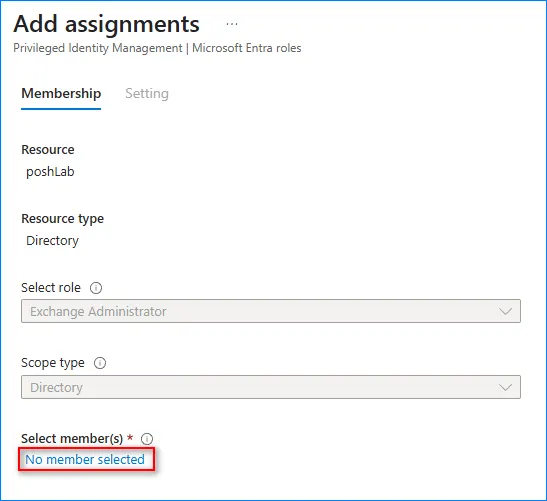
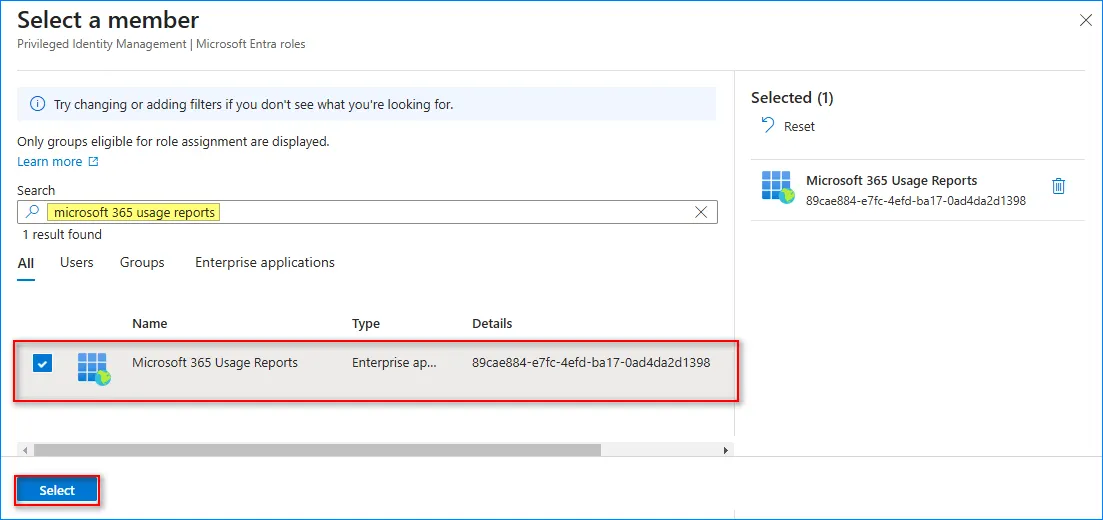
Search your app’s name, click it on the list, and click Select.
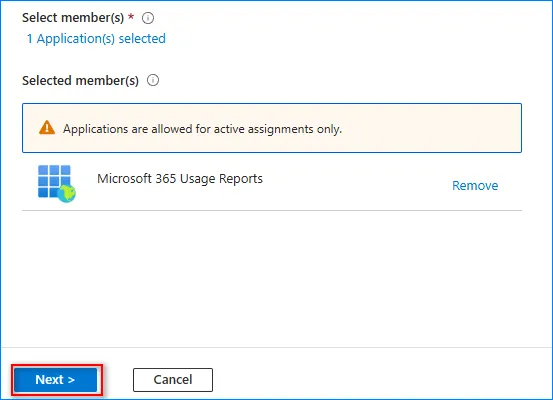
Click Next.
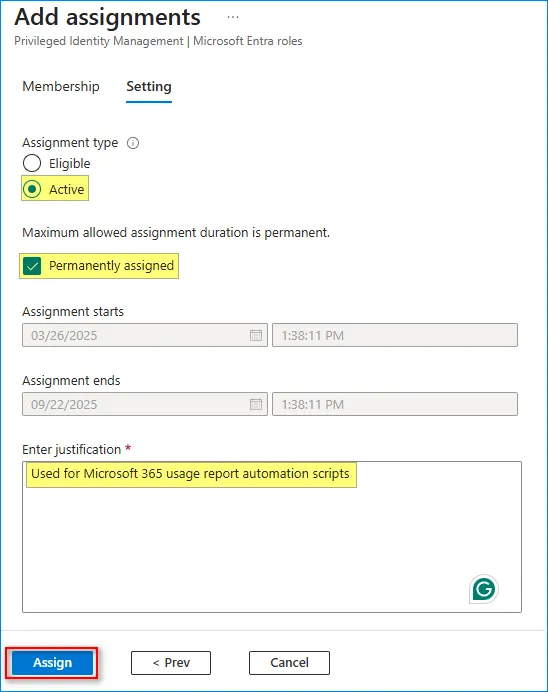
Select Active, enable Permanently assigned, type the justification text, and click Assign.
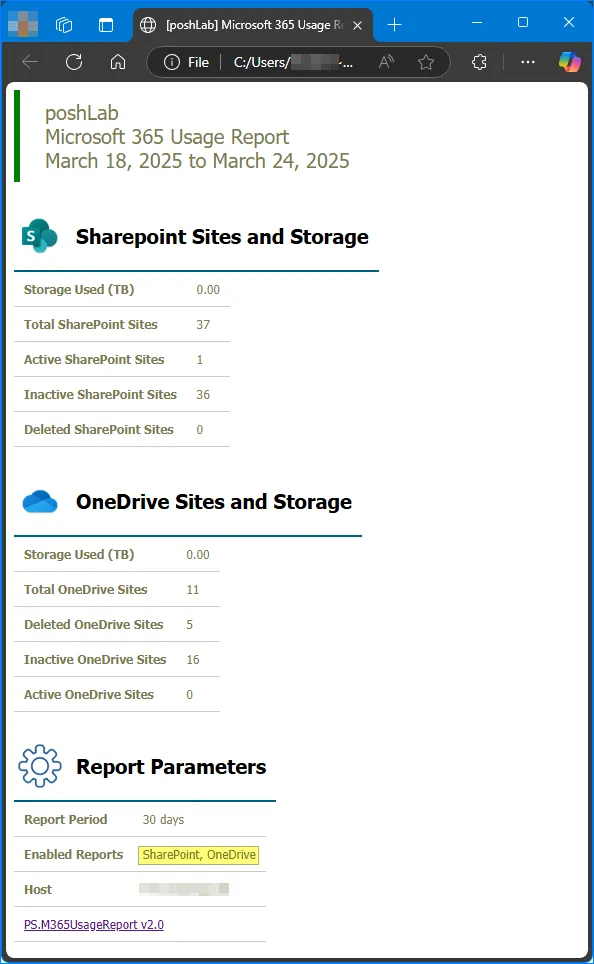
Sample Report
Below is an example of the HTML usage report sent as an email.

HTML File
The HTML file report is saved at "$env:TEMP\M365UsageReport\<org-domain>\Microsoft_365_Usage_Report.HTML". Its contents appear exactly as the body of the email report above.
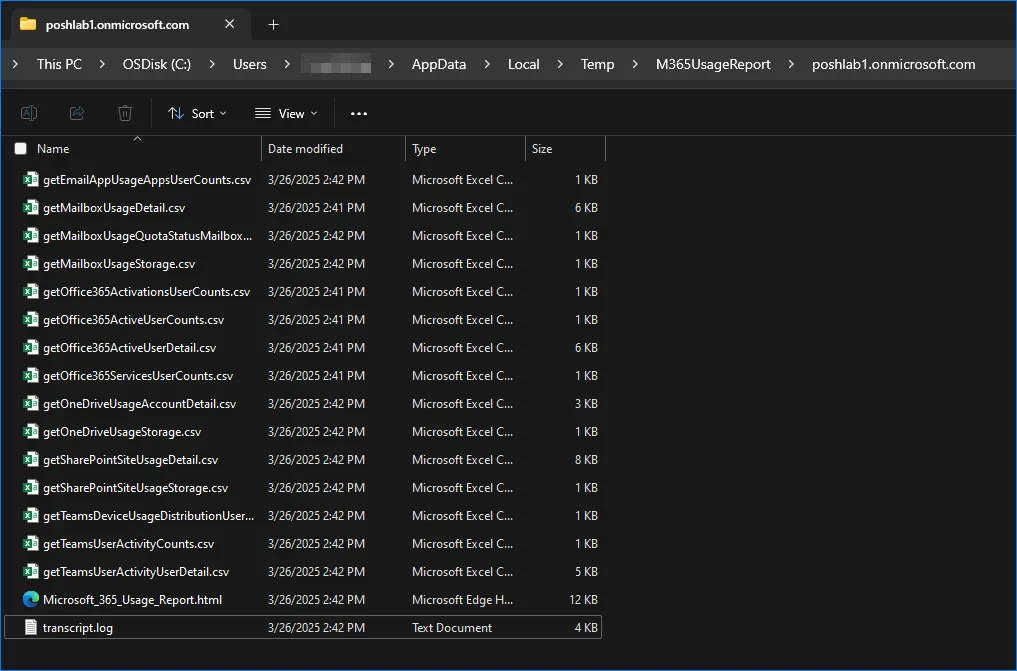
Raw Data CSV Files
The raw data CSV files are also found at "$env:TEMP\M365UsageReport\<org-domain>".